Over the years, I have used scraps of yarn to make woven brooches. It’s an easy process and could be applied to add texture to textile art and Artist Trading Cards. Give it a go if you are looking for something different to try.
The technique involves weaving threads with interesting textures through warp threads stitched on fabric. I don’t have step-by-step photos but the instructions should be easy to follow. This tutorial is for a brooch that will be approximately 5cm square.
1. You will need a template – rigid cardboard is good. Draw a 5cm square on the cardboard and cut it out.
2. Cut a square of fabric approximately 16cm. The fabric will be trimmed back after the stitching and weaving is completed. I used dark blue taffeta for all my brooches. You need to be aware that the sides of the fabric will be seen, so choose a colour that works with your threads.
3. In the centre on the right side of the fabric, trace around the template with a pencil.
4. Draw lines to divide the square into three sections.
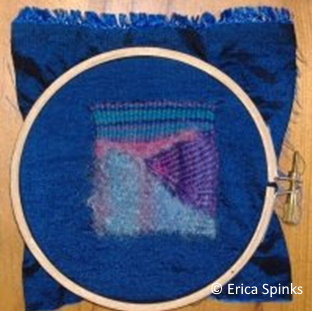
5. Put the fabric into a 10cm embroidery hoop.
6. Use Perle thread (about 180cm long) to stitch warp threads in each section. Try to make the direction different in each section. This photo shows these three sections. The top warp threads are only partially woven with a decorative thread.
7. Choose three different decorative threads, each about 75cm long. Variegated and fuzzy yarns work well; lumpy ones do not.
8. Weave one section at a time. Use a tapestry needle to weave the threads through the warp threads. Once you reach the end of a row, weave the thread around the end warp thread to start a new row.
9. While still in the hoop, stitch beads on the brooch, if desired.
10. Remove the fabric from the hoop and place it over the cardboard template. You will be folding the fabric to the back and stitching it, so trim the fabric neatly to fit.
11. Stitch the fabric over the template. You can glue a small piece of felt or leather to the back of the brooch if you want to cover the seams.
12. Stitch or glue a brooch pin to the back of the brooch.
13. Wear your brooch with pleasure!
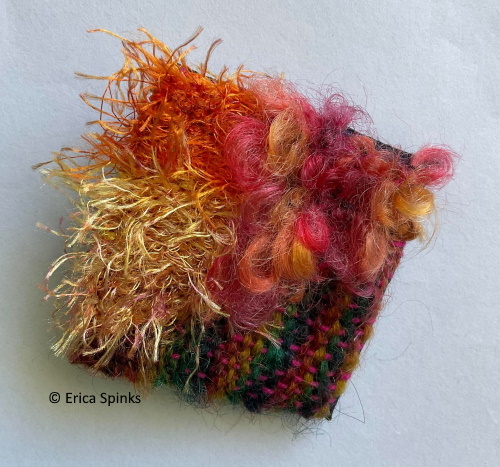
I used a combination of variegated yarn (bottom right), loopy yarn (top right), and yarn with long strands (left) for this brooch.
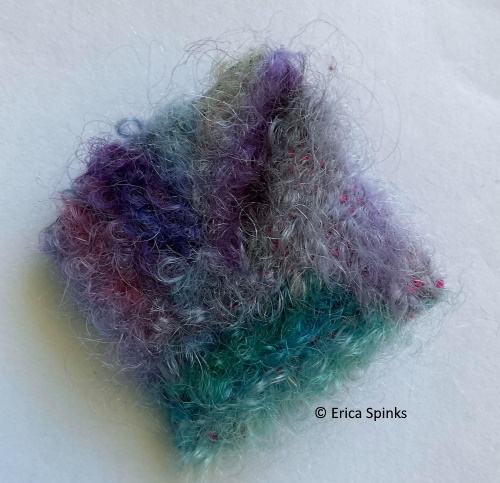
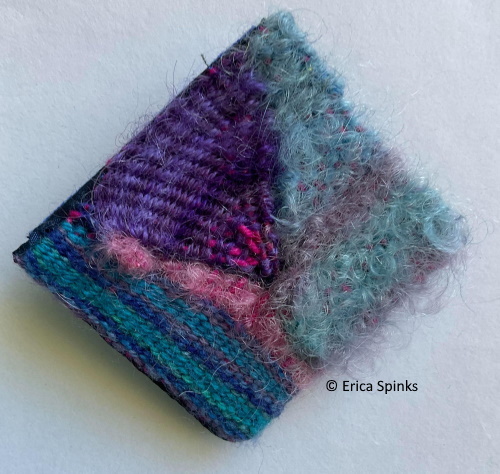
This brooch features two different fuzzy yarns. See how the change of direction of the warp yarn makes the top left and right sections adds interest.
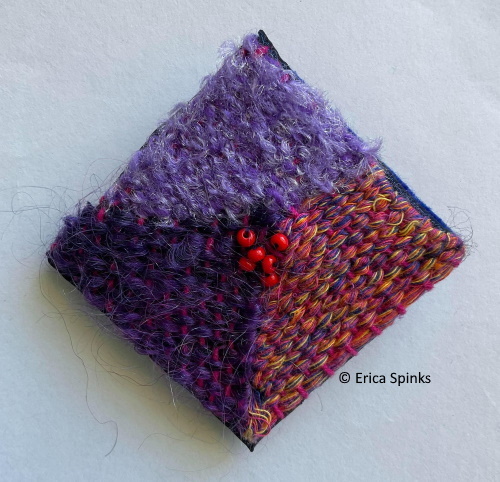
This brooch features red beads in the centre to add a focal point.
Again, I used a combination of variegated and fuzzy yarns to make this example
I do hope you try this technique. Please let me know if you do!